Minneapolis, MN: Kurt Manufacturing’s automated gaging systems improve the overall manufacturing of pistons for small, air-cooled gasoline engines. By measuring these pistons for ± .0005 inch tolerance and .0001 inch repeatability at the rate of one per 9 seconds, repeatable quality is assured while eliminating hand gaging operations. Validation of upstream precision machining and die casting operations thus insures uninterrupted, 24/7 automated manufacturing.
As more manufacturers automate their precision manufacturing processes, they are adding automated gaging as the final step. Maximum benefits apply: higher quality with no operator interaction to cause error, reduced labor content because the process is automated, faster throughput, reduced scrapped parts, all of which contribute significantly to increased profitability.
Kurt In-Line Auto Gaging Systems have allowed several Kurt Engineered System’s customers to fully automate their engine piston gaging processes, an important adjunct to new, high speed automated piston machining lines. The complimentary processes — automated machining and automated gaging — greatly increase precision component output to meet rapidly growing market demands while ensuring repeatable quality.


New Kurt In-Line Auto Gaging Systems provide 100 percent piston inspection. Each gage measures three part diameters on each piston at the rate of one piston every 9 seconds.
The heart of every engine is the pistons, but the least heralded operation in their manufacture is the gaging and verification of tolerances of these critical components. New piston designs, because of their odd shape and contours, require precise verification of tight tolerances. Machining centers most often get the credit for producing these unique piston shapes. Yet the gaging and verification process ensures that machining centers do the precision work they are supposed to do. When automated, these gaging systems really help increase production rates because of their reliability and high repeatability and because they significantly reduce labor content when compared to hard gaging methods.
Market Demand And New Emission Standards
Lead To Major New Piston Manufacturing Processes For Engine Manufacturers
The small engine market changes constantly due to product innovation, consumer demand and governmental regulation of engine emissions. Add to that the need for greater fuel efficiency, easier to operate products and offshore competition. The result is that manufacturers of products ranging from lawnmowers and snowthrowers to outboard motors and tree trimmers require improved motor designs that often center on higher quality piston assemblies.
With a high level commitment to provide customers with the finest quality products, manufacturers of these engines are doing their own die casting and installing entirely new machining lines. The effort is to both shorten the manufacturing chain while improving quality and time to market. With one of the Kurt Engineered Systems’ customers, the new manufacturing approach included expansion and streamlining of in-house die casting facilities, addition of multiple new custom engineered precision machining lines and the addition of automated gaging systems to support the machining lines.
Piston Gaging Experience Leads Customers To Go With Kurt — Real Time
Machining Adjustments Made Possible With Electronic Gaging Data
Kurt has a long relationship with automotive and aerospace customers with success gaging all types of engine components including pistons. Repeatable accuracy and throughput speed are vital in these systems. So when a customer came to Kurt asking for an automated gaging process that could stay ahead of the output of six new machining lines, Kurt designed the solution. Each line was capable of finish machining 350 pistons an hour. The customer wanted 100 percent part inspection with the ability to monitor readings in real time with machined piston traceability back to the spindle that machined it. 100 percent part inspection was required for all six machining lines so that any chance for human error in the inspection process was completely eliminated. And the customer wanted to have the capability to make very fast machining adjustments based on real time readings from the automated gages. The gaging software, therefore, was a critical element in the planned automated gaging setup.
Kurt Gaging Software Is Configurable To The Application And Is User Proven
Kurt’s gaging software for these piston gaging applications includes the patented KurtICS, KurtUSB and KurtSPC Premium Software systems. These are time-proven over many successful customer applications including those involving engine components and pistons. Customers thus have confidence that the Kurt hardware/software combination, when configured to their application, not only will operate up to expectation but also will eliminate the need for customized software design.

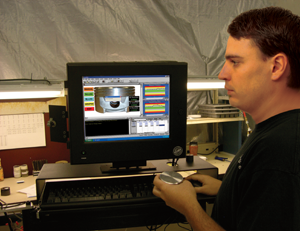
Gaging data is displayed real time and allows operators to follow trends and take corrective actions.
Some of the features of the KurtSPC Premium software that customers appreciate include real-time variable and attribute charting, spreadsheet, light column and digital data entry, customizable screens and reports, advanced statistical analysis, event actions, multi-level security access and screen lock-out. Customers also like that the software has PC based part prints, photo and CAD drawing displayed with features, video and sound, control checks, error codes and text tagging. Even though all of the listed features are important, the most important feature KurtSPC Premium provides to most customers is the fast, automated and reliable gaging of every machined component.
A typical Kurt gaging installation for piston gaging operates thusly: Finished machined pistons are automatically conveyed, single file, from the machining center into the Kurt Gage where a vacuum pickup raises one piston at a time into the gaging “nest.” A pneumatically operated assembly containing three measurement probes is automatically positioned at critical points on the barrel and contoured piston surface. Three locating pins and three datums precisely position each piston and then the readings are made electronically. The piston “skirt” must have a tolerance no greater than .0005 inch for acceptability. Any piston not meeting this tolerance is automatically diverted into a special container for further examination. The readings for each piston are displayed in real time, stored in the KurtSPC Premium database and transmitted to the customer’s network.


Motorized conveyor moves pistons into the Kurt gages where they are gaged for correct tolerances. The new systems provide 100 percent piston inspection of 3 critical diameters where previous hard gaging allowed only 80 percent inspection of just one feature.
Acceptably gaged pistons are conveyed out of the gage downstream for additional operations such as washing, metal finishing, packaging and assembly. (Note: many piston manufacturers permanently engrave unique identifying codes showing machining date, time, machine and spindle location for traceability for the life of that piston.)
Synchronization of these gaging systems is also important. To match the output of the automated machining centers, each Kurt gage is programmed to process one piston every nine seconds. Piston flow-through from machining center, into and out of the gages, is smooth with no part build-up through the conveying process. In the application previously described with the machining lines equipped with Kurt gages, an estimated 2000 pistons are machined and gaged an hour. Using the new process, the projected annual output is 1.25 million pistons.
www.kurtelectronics.com
::Design World::
Filed Under: Factory automation, Gages, ELECTRONICS • ELECTRICAL


Tell Us What You Think!