Manufacturing is highly competitive. To keep that competitive edge, your control system must provide safe machine operation, and return a stopped machine to production as quickly as possible.
An aggressive focus on machine safety is one of the most significant trends in automation today. Although everyone supports a safer working environment, safety systems can hinder production, if not designed or deployed properly. But this need not be the case; improved safety and productivity can go hand in hand. To accomplish this dual strategy, we must design our machines and their control systems for recovery.
So what is Design-for-Recovery (DFR)? It’s based on returning a machine to service as quickly as possible after an interruption. DFR has many implications in machine design, including layout, process flow, labeling, training and spares, as well as providing easier access to the machine. Here are some of the factors you’ll want to consider in DFR.
This article focuses on three basic concepts that apply to the safety-related-parts of the machine control system: 1) the machine access strategy, 2) the safety system diagnostic strategy and 3) the zoning strategy, as they relate to recovery time.
Machine access strategy
Access points to a machine must be commensurate with the expected frequency of the tasks and machine rundown times. When frequent access is required, opening and closing barriers and gates proves time-consuming and thus hinders recovery. Safeguarding devices — such as light curtains, safety mats and laser scanners — would serve these applications well. When rundown times are lengthy, light curtains may not be acceptable as the operator may be able to reach the hazard before it achieves a safe state. You can use safety-rated speed-monitoring devices to allow access to the machine as soon as it achieves a safe speed rather than wait for a ”fixed” time, which allows for the maximum possible time required for a machine to stop.
Three primary types of access are available for recurring tasks: 1) partial body access, 2) full body access with trip detection, and 3) full body access with constant detection.

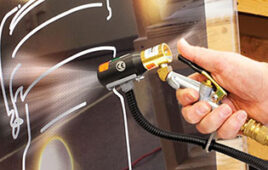
Partial Body Access for direct access and quick recovery.
Partial body access occurs when a person maintains a portion of his or her body in the protective zone of a safeguard while accessing a machine. (This also is sometimes called a “reach-through” application.) An example would be reaching through a light-curtain field or interlocked gate. This approach provides direct access to the hazard area and a quicker recovery, and it incurs a larger upfront cost for multi-stage machines, as safeguards must be provided for each access point. However, reduced recovery times offer long-term cost savings because operators have direct access to where a stop occurred. Light curtains should be used where access is frequent (every few minutes or less). Interlocked gates should be used for medium cycle times, or where the potential for ejected parts may be a hazard. Gate interlock switches and speed monitoring should be used for long rundown times.

Full-body access with trip detection can be improved by offering multiple access points.
Full body access with trip detection occurs when a person passes through the protective zone of a safeguard. Full body access often is used with “perimeter guarding,” where a fence or wall surrounds the machine. Entry would be through a safeguard, which might be a presence-sensing device or an interlocked gate. Typically, the operator shuts down the machine and then enters the guarded area. This approach allows multiple persons easier access to the hazard area. The drawback is the time lost walking into and out of the single entry point and then to the location where the task must be performed. Use multiple entry points to help improve recovery time.

Full-body access with constant detection.
Full body access with constant detection occurs when a person has unobstructed access to the hazard and is detected at all times during the access. Techniques to accomplish this include laser scanners, safety mats, and horizontally mounted light curtains. The ease of direct access to the machine makes this approach ideal for recovery, even though it has higher upfront costs and takes up more floor space due to requirements of stop time distances. In the example shown above, a scanner detects the operator at all times during the task.
System diagnostic strategy
Diagnostics play a huge role in DFR of safety-related systems. Diagnostics are critical for quickly identifying the system demand as well as guiding the workers through a quick and effective restart routine. After executing a task or set of tasks, the safety system must be returned to a protective state before returning the machine to a running state. Each safeguarding device must be returned to an “ON” state — a state that allows the machine to restart.

Detection with diagnostics, so individual open gates and safety device faults can be detected.
Sensor diagnostics can be handled many ways. One common arrangement for integrating safety systems is to connect the interlocked guards in series. But internal impedance of the safety logic device limits the number of gates that can be connected in series. Some logic devices can accommodate tens of gates and even higher. A pair of wires is run from the safety logic device (for example, a monitoring safety relay) to the first interlock. The wire pair continues through each of the interlocks. Finally, the pair of wires returning to the logic device closes the circuit. Although this approach is less expensive to install than other approaches, it has two major weaknesses. First, if one of the gates is not closed, the machine operator has no way of knowing which gate is open, so time is wasted as the operator walks to each gate to confirm it is closed. Second, if a problem (like an open circuit) occurs within one of the interlocks, finding the problem is challenging. So this design risks a major loss of production time.
One way to improve this design requires a third contact in each interlock to signal the machine control system (typically a Programmable Logic Controller, or PLC). This is more expensive due to the additional wiring, the PLC input points, and software code needed to display the gate status. If one or more gates are not fully closed, a machine operator is informed of exactly which gates are open. Thus the machine operator does not waste time checking all the gates. This approach, however, still suffers from the long series of safety wiring. Troubleshooting the safety circuit can be time-consuming and potentially costly.
A third (and sometimes preferable) approach is to connect the individual gate interlocks directly to the safety logic device. This approach performs best when recovery is strategically important. Typically, safety logic devices of this type can communicate with or can be integral to the machine control system, informing the operator of the gate status (open or closed), or whether a fault condition exists in the safety circuit. This helps minimize the troubleshooting process as the location of the specific fault is quickly identified and resolved.
Actuator diagnostics (the contactors and drives) are important in DFR design. Contactors often are cited as having the highest failure rate due to the high current switching they perform. Many safety relays monitor the actuators by connecting normally closed contacts in series. When only one or two actuators are monitored, diagnostics are relatively straightforward. As the number of actuators increases, the ability to recover from a fault takes longer due to the difficulty in troubleshooting.
In the example below, one monitoring safety relay controls six contactors (K1 — K6). The monitoring circuit (MC-MC) verifies that all the contactors are off before the safety relay energizes them. This design’s weakness is the troubleshooting time required when the machine cannot start because of a contactor fault. Which contactor has the fault?

Series monitoring of actuators.
A better approach uses a Safety Input/Output block, so that each contactor is monitored individually. This approach uses individual wiring from each contactor back to an I/O block. If a contactor faults, the safety PLC knows exactly which one. Troubleshooting time is reduced as the faulted device can be quickly identified on a display terminal.
Zoning
Zoning also can be helpful in reducing or even eliminating recovery time. Longer production processes run more efficiently if the process is broken down into semi-independent zones. Zoning allows a portion of the process to be stopped while the other portions continue to run. In an ideal world, material goes in at multiple points of a process and a product comes out at the end. But the real world must accommodate momentary slowdowns and shutdowns to replenish materials, clear jams, make adjustments and other similar tasks. Allowing small amounts of inventory to accumulate between zones or using parallel zones allows selected zones to shut down for quick tasks.
How do you implement zoning? ISO11161 and ANSI B11.20 standards offer guidance on safety aspects of zoning and related issues. A few examples will help highlight the benefits of zoning for reducing recovery times.

In zoning, one zone (above) may be good, but multiple zones (below) are more effective.

In the example shown here, four machines are connected in series. The slowest machine limits the overall production rate: 40 units/minute. Two obvious safety solutions are to place perimeter guarding around the whole process or create safety zones, one around each process. With the single perimeter guard, the whole machine must be shut down for a routine task. Let’s say the task takes 10 minutes to complete, then the production loss is 40 units/min x 10 minutes = 400 units.
If we create four zones, and Zone 2 needs a 10-minute routine task, then the loss may be avoided if a buffer of 400 units can be added to Zone 3. Zones 1 and 2 must stop during the task, but Zones 3 and 4 continue to run. After 10 minutes, Zones 1 and 2 come back on line just as the Zone 3 buffer is dwindling to zero units. If the process is designed in this manner, then a zoned safety-related control system is required to take advantage of the added buffer.
In each of these zoning examples, the safety system must complement the production system, creating an integrated safety/production machine control system. What methods are available for zoning safety systems? To accomplish zoning, use simple safety relay architectures or more sophisticated safety-rated PLCs.
The safety PLC approach works best in larger, more sophisticated machines, or where the process requires tight coordination between the safety and standard control systems as in the diagram with three zones. Safety devices are connected directly to safety-rated blocks for individual diagnostics. Safety information is communicated over a safety-rated network (CIP Safety over DeviceNet in this case). Status notification to neighboring zones is accomplished easier with this architecture. Zone 2 employs speed monitoring to allow access to the machine as soon as a safe speed is achieved. In addition, the GuardLogix processors integrate closely with the non-safety portion of the machine control system. Interlocked gate and actuator status are communicated easier to the display terminal. This approach can be readily expanded to numerous zones.

Integrated safety and production system with three zones.
In an intermediate level of sophistication, logic devices locally control the safety at the individual zones. The SmartGuard can be programmed to turn off the hazards under predetermined conditions and communicate its status to the other zones over DeviceNet. The SmartGuard also communicates status information to the ControlLogix machine control system.
For simpler machines, you can use safety relays, which provide a simple, configurable, low-cost approach to zoning. Each sensor is connected to an individual input and actuators are monitored on a zone basis.
Rockwell Automation
www.rockwellautomation.com
Know the standards
It’s important to be aware of safety standards and regulations. The prevention of unexpected machine start-up while a task is in process is one common theme. Tasks fall into one of two categories: 1) routine, repetitive and integral (RR&I) to the production process and 2) those that are not routine, repetitive or integral. For more information on RR&I, see OSHA 1910.417 (USA), ANSI Z244.1 (USA), and Z460-05 (Canada) and ISO11418 (International). For those tasks that do not qualify as RR&I tasks, all energy sources must be removed and locked off before tasks can be performed. For those tasks that are routine, repetitive and integral to the production process, safeguarding principles may be implemented when properly specified through formal risk assessment. This article addresses Design-For-Recovery for those tasks that safeguarding principles can protect.
::Design World::
Filed Under: INDUSTRIAL SAFETY SYSTEMS


Tell Us What You Think!