Support structures can make or break a 3D print, but they are absolutely necessary, especially with parts that have complex geometries and overhangs. With support structures, material use goes down saving time and money. Support structures also reduce scarring and improve print surface finish.
Here are several tips to optimize support structures, courtesy of Blake Huebner, at
3D Platform.
- Use the print angle to your advantage
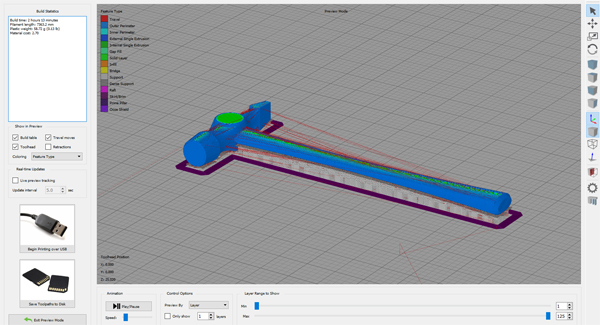
The part to be printed can be rotated in different ways to alter the amount of support structure needed. A tip– the shortest print time may not always produce the best surface finish. Examine the photo below. In this example, print time was short as the object was printed flat, but it required more support material. Adjusting the rotation angle delivered the best angle for minimal support material.
Too much support, not the best option for surface finish.
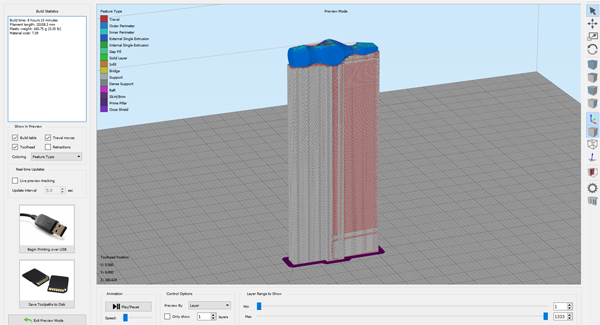
Way too much support material.
Optimized support material.
- 2. Use custom support structures
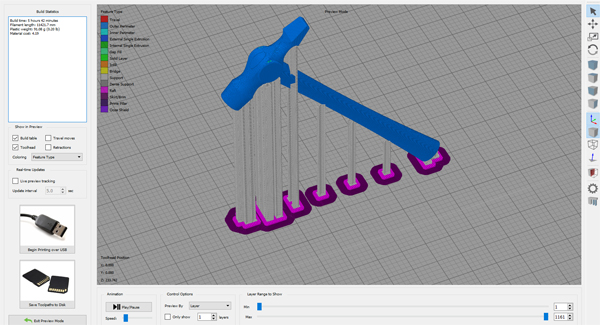
If the 3D printing software you use allows you to alter the placement of support structures, take advantage of this feature. It will reduce the number of failed parts and save you frustration. The handle of the hammer in the photo below has a long print time with no support structure.
This could potentially make the print unstable and cause the entire print to fail. The addition of a few support columns avoids a potential bad ending.
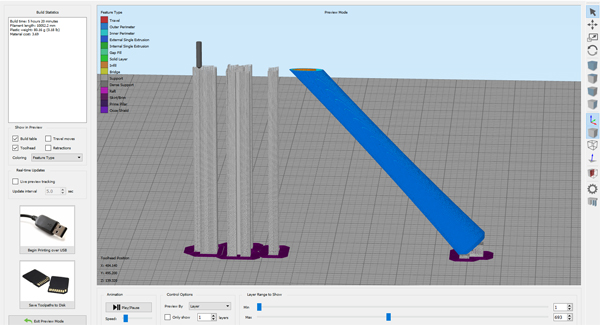
Not enough support material to keep the print from tipping over.
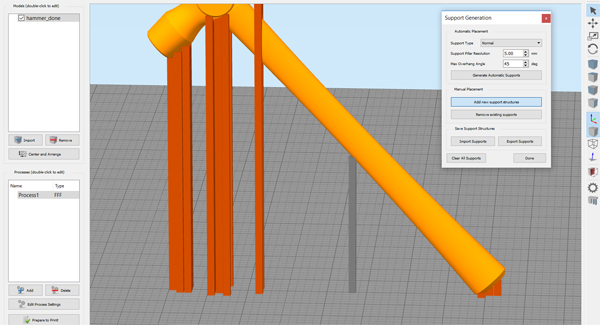
Adding customized support structures in Simplify 3D.
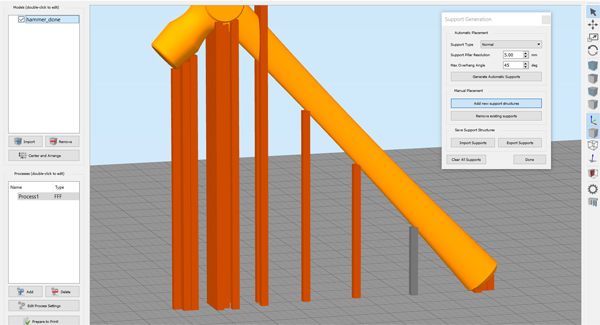
Optimized support structure for part geometry.
- 3. Use separation layers
For easier removal of the support structures, use a few separation layers. Separation layers eliminates potential damage caused by prints glued so tightly to the support structures that they will never be removed cleanly. Separation layers also reduces print scarring.
No separation layer, support material is adhered to the print.
Separation layer, allows for easily breakaway support material.
3D Platform
3dplatform.com
Filed Under: 3D printing • additive • stereolithography

Tell Us What You Think!